


Why am I starting a newsletter? And what should you expect?
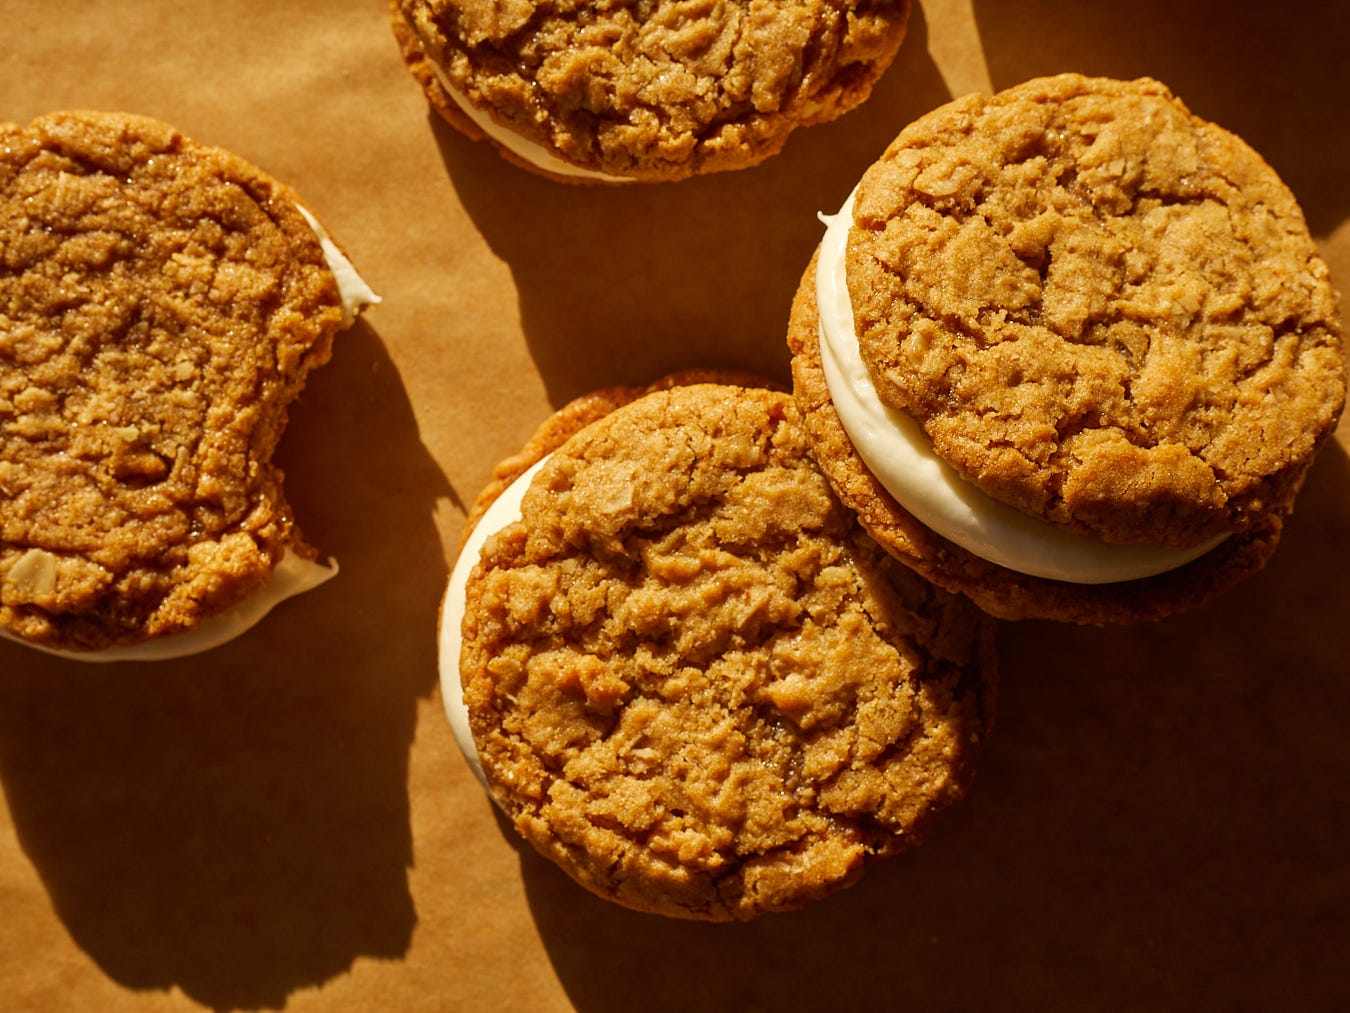
Plus, the recipe for Brown Butter Oatmeal Cream Pies with Cream Cheese Filling.

This post is mainly about the thought process behind my decision to start this Substack (we don't have a name for it yet — sound off in the comments with ideas!) and what you can expect from my emails. It contains some info/context about what has been going on behind the scenes at EGO headquarters, but if you’re already sold (well, I mean, you’re already here, but if you’re already sold on a paid membership) it is not required reading. I promise, the next email will be full of more fun stuff like recommendations and goings-on in both easygayoven and Eric King land.
Okay, let me be honest…
Starting a newsletter wasn’t on my 2023 bingo card, but I think it’s going to help you and I get more out of easygayoven in the months and years (fingers crossed!) to come.
Why is Eric doing this?
If you have been feeling more and more disconnected from social media … same. Hard same. The algorithms, trends, audios, they’ve kind of flattened everything and it feels like actually reaching the community we’ve been growing since July 2019 (wow, old!) is becoming harder and harder.
When I left my full-time job in December 2021, I was laser focused on growing this community on social media and I didn’t make a dime until June 2022. I have given all recipes and information away totally for free, and I am so grateful to those of you who found me, made my recipes, shared them with friends and family, and responded with excitement and love online.
When it comes to the business easygayoven, I have made almost all revenue through sponsored content and recipes. I have been discerning when it comes to which brands I work with, and I turn down probably 50-75% of the offers sent to me because your trust is important to me (and I know people don’t really like sponsored content.)
I’m going to try to be frank. Okay, now I’m going to to try to be Eric. I’m still a small-ish creator. Brands (even big ones) do not pay me very much. I make up what they don’t pay me with my freelance writing (which I still love doing.) If I did rely on just branded content to keep this boat afloat, you’d be seeing like four sponsored posts a month, which I don’t think anyone wants.
So, for a combination of the above reasons, I want to give you a new opportunity, or I guess, two different opportunities. 1) Support my work with a monthly or yearly subscription, and unlock exclusive recipes, classes and more perks. 2) Support me by simply subscribing, for free, and get early access to my public recipes, my very best recommendations on culture, restaurants, products and more, as well as updates on recent projects and my life!
I will spell out more on pricing tiers and their offerings below.
If you’re not subscribing, you’re only getting *half* the story…
There’s only so much I can share in captions and Instagram Stories (which, now that we’re in a safe space, I can admit that I’m very bad at documenting my comings and goings through stories.) I want this newsletter to feel more like a group chat where I’m dropping in the stuff I think my friends would like: links, products, memes (?) etc.
What kind of recipes will I be featuring?
When I’m choosing recipes to develop, I first have to consider what the audience across Instagram and TikTok want, duh. But I also have to consider what has the potential to grow beyond my typical reach and hit the feeds of new people who haven’t found easygayoven yet — as well as what people are searching for online. (SEO can be fun to learn and research but it also sucks the life out of recipe ideation and blog writing. That’s another email.)
This newsletter will be unbound by the latter restrictions, and will help me focus more on just what you all, the core community of easygayoven, want. That’s why the paid membership tier also includes access to join the online community and post comments — as well as opportunities to vote on future recipes.
Okay now let’s talk about price and what you actually get.
Here’s how I’m thinking about this right now:
Free Tier
Be the first to know about my new free recipes
Culture, recipe, restaurant and product recommendations
Updates on recent projects and my life!
Paid Tier ($5/month or $45/year)
Everything included in Free Tier
Exclusive, paid-only, recipes (ones that I know you — not algorithms or SEO — will love!) every month!
Vote on my next recipes!
Post comments and join the community
Access to occasional live video call classes
Super Fan Tier (Founding Member) ($150/year)
Everything included in Paid Tier
1 baking class with Eric and up to 5 friends of your choosing! (video call)
The warm, special feeling that your support helps me keep this train a-runnin’!
Now let’s talk about the recipe!
These brown butter oatmeal cream pies with cream cheese filling are what would happen if Little Debbie grew up to be a 29-year-old in Brooklyn working at Bon Appétit. Like 4 years ago. Oats are blitzed into the dry ingredients as well as folded, whole, into the finished dough. Molasses, brown butter and lots of vanilla deepen the flavor of the cookies and the cream cheese filling makes things not-too-saccharine-y sweet. They are much, much better after softening up for a few hours or even a day or two in the fridge.
Oatmeal Sandwich Cookies
Active Time 1 hr 45 mins
Total Time 3 hrs
Ingredients
Oatmeal cookies
10 tablespoons unsalted butter 141 grams
1 tablespoon molasses 15 grams
1 cup dark brown sugar lightly packed (190 grams)
1 large egg cold, straight from the fridge
2 teaspoons vanilla extract
1 cup all-purpose flour 130 grams
2 tablespoons corn starch
1 teaspoon baking soda
1/2 teaspoon baking powder
1 teaspoon kosher salt
1/4 teaspoon cinnamon
1 cup old-fashioned, rolled oats 105 grams
Cream cheese filling
6 ounces cream cheese at room temperature 170 grams
3 tablespoons unsalted butter 42 grams
2 cups powdered sugar 261 grams
2 teaspoons heavy whipping cream 10 grams
Pinch kosher salt
1 teaspoon vanilla extract
Instructions
Brown the butter. In a small saucepan, melt the butter over medium-low heat. Cook the butter, stirring and scraping the bottom occasionally, until it begins to bubble and pop. Continue cooking until it starts foaming and you can see dark brown flecks swimming in the butter when you stir. You’ll know it’s done browning when you no longer hear bubbling and popping — as that’s when all the water has been cooked off. Transfer to a medium mixing bowl and place in the fridge until it is just barely warm.
In a food processor, blitz a half cup of the rolled oats until very finely ground. Add in the flour, cornstarch, baking soda, baking powder, salt and cinnamon and pulse a few times to mix. Set aside.
Once the browned butter has cooled down, whisk in the molasses, dark brown sugar and vanilla extract just until combined and glossy. Whisk in the egg.
Dump in the dry ingredients and fold them into the wet ingredients. Once the mixture is almost totally combined, add in the oats and keep folding until the last streaks of flour disappear.
Scoop out about 20, 1-ounce dough balls (I used a heaping #40 scoop) and chill them in the refrigerator, covered, for at least 1 hour, or until completely firm.
Place 8 cookies on a half sheet tray and bake
Preheat the oven to 350°F. Bake for 6 minutes, then tap the tray against the rack to deflate the cookies and help them spread. Rotate the tray and continue baking for 3 to 4 more minutes or until the cookies are browning around the edges, and the center is just barely set. Transfer to a wire rack and repeat with remaining dough balls.
While the cookies are cooling, make the cream cheese filling. Using a hand mixer, or in the bowl of a stand mixer with a paddle attachment, beat the cream cheese and butter until combined. Add in the powdered sugar, heavy cream, salt and vanilla extract and continue to beat until fluffy and smooth, about 1 minute.
Using a piping bag fit with a round tip, or using a zipper bag with the corner cut off, pipe a swirl of filling onto 10 of the cookies. Leave enough room around the edges for the filling to spread when they are sandwiched with the tops. Then, top each with the remaining 10 cookies, pressing down just so that the filling comes to the edges.
Notes
These can be eaten right away but are best after chilling, covered in the fridge — at least an hour but up to 24 hours is great. This way, their filling has time to set in the fridge and the cookies absorb moisture and become super soft and chewy.
Do not use instant, quick-cook, or steel-cut (also called Irish) oats. Those will not achieve the same texture we want. Use old-fashioned, rolled oats.
So excited for this next step for you Eric! Anytime I can meaningfully engage with your content I will jump at the opportunity. You’ve got the best recipes around in my humble opinion. 🥰🥰🥰🥰
Congrats on taking the leap. Wishing you all the best!! 🍪